Setting Up a $60 VPN and Cloud Server -- Part 2
Once the hardware is running and programs installed, we aren’t quite finished yet. Some final steps need to be taken before we can actually use any of it.
OpenVPN
For setting up OpenVPN, most of the heavy lifting has already been done. In fact, a set of 3 .ovpn files have been created for you. These files can be imported into an OpenVPN client on your computer, phone, tablet, and almost any other Internet-connected device.
One word of warning – an .ovpn file contains everything needed to connect to your personal VPN. This means there is no username or password or anything else to it. While convenient, it also lets anyone else with access to that file connect to your VPN. At best, they’ll take up your bandwidth. At worst, they’ll commit illegal acts through your network. So, make sure you keep these files safe and don’t share them!
ownCloud
Just as the name suggests, ownCloud is a file storage system akin to Dropbox, Google Drive, or MS OneDrive. On your main computer, open a browser and go to https://cloud.<yourdomain>.<tld>. You’ll see a screen like this one, prompting you to set up your OwnCloud installation. Pick a username and a good password for yourself.
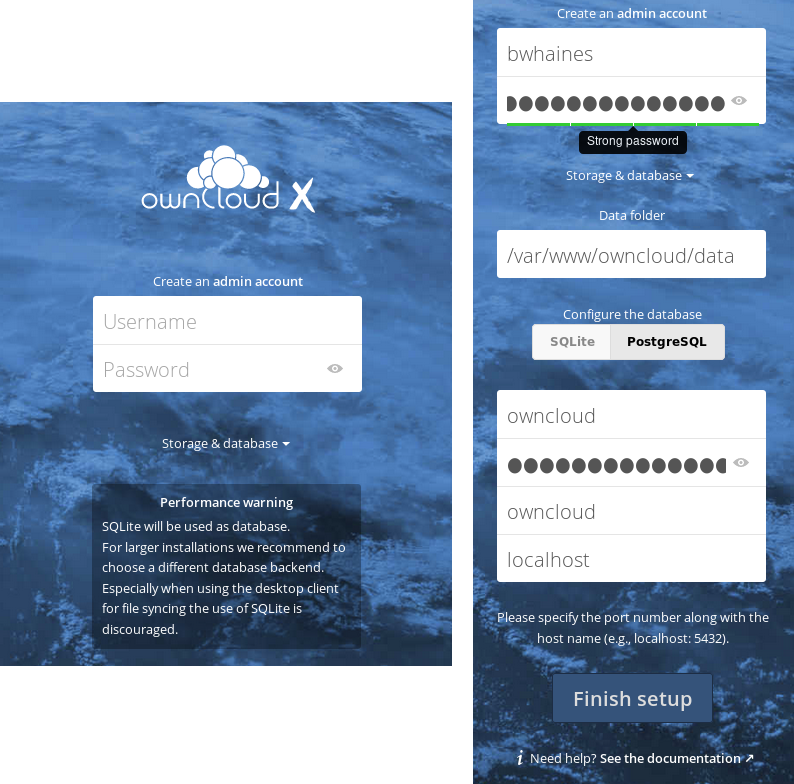
If you looked through the Sovereign files before running them, or paid attention to the Ansible output, you might recall that PostgreSQL has already been installed and setup to use with ownCloud. Click the “Storage & database” dropdown and change it from SQLite to PostgreSQL and enter the database info (see above). The username and table is owncloud by default, while the password is stored in the Sovereign folder of your main computer, in Sovereign/secret/owncloud_db_password.
After a minute of loading, your personal cloud is ready to use! You can log into the cloud URL above or install the ownCloud mobile app. The official app costs $0.99 on Google Play, but it works well.
SelfOSS
When I tried to open this for the first time, I was greeted by a wonderfully vague error, “an error occured”. I later discovered that this could be expanded by modifying the common.php file and changing the DEBUG variable to 1. For me, the error was just a matter of file permissions.
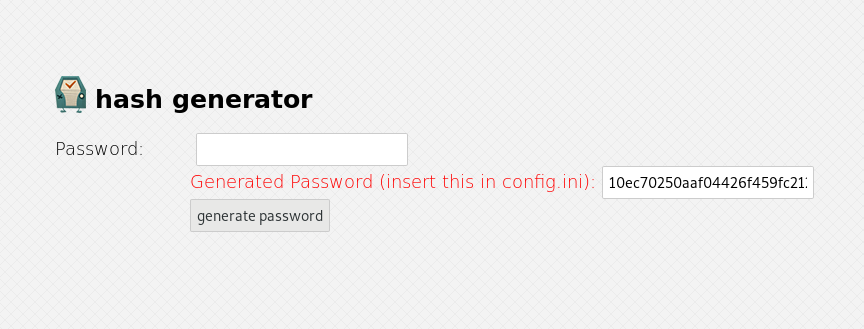
Before logging in, you’ll have to set up your password in the SelfOSS database on your Pi. Go to news.<yourdomain>.<tld>/password and enter the password you want to use. This will generate a hash, a long hexidecimal string. Put that hash into the file /var/www/selfoss/config.ini in the password field.
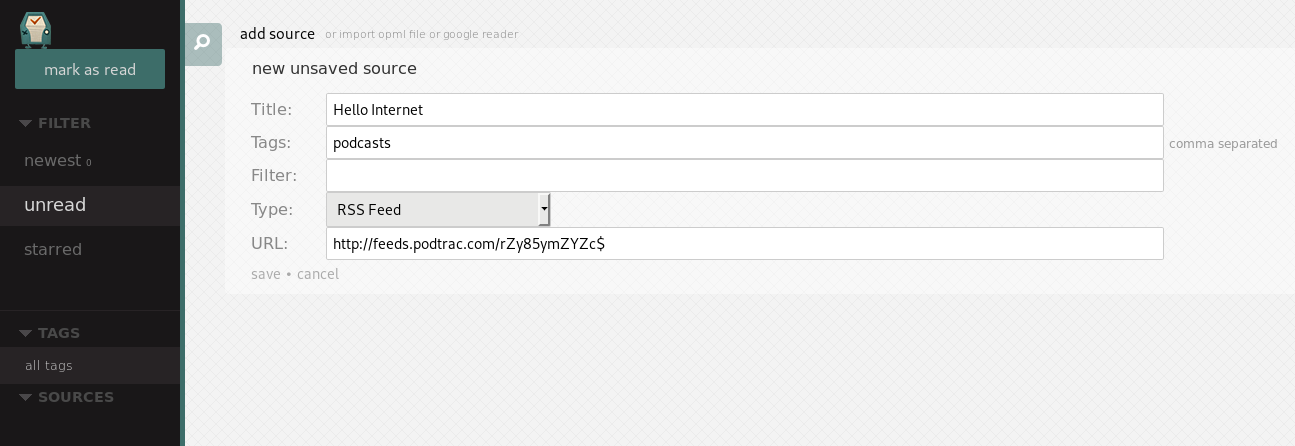
Once working, the website is relatively simple. You can add new sources in the options menu, opened with the cloud-and-arrow icon in the bottom left, by clicking on the add source text. A source can be an RSS feed, Twitter, Facebook, reddit, deviantART, a GitHub repo, and more.
Wallabag
Wallabag was the most difficult to set up of these. Instructions can be found here, but the shorter version is this:
1) Get the salt for your password from /var/www/wallabag/inc/poche/config.inc.php
2) Concatenate your password, login, and the salt into one long string, in that order. Use shasum to generate a hash of that long string.
3) Log into postgresql to add that hash to the Wallabag database:
su postgres
psql wallabag
4) In the database, add your user info to the users table:
begin;
INSERT INTO users VALUES (1,'<your_login_username>','<your_hash>','<your_login_username>','<your_email@website.com>');
commit;
Quit postgresql with the \q command, then your Wallabag instance is ready!